This is where you will go to create POP accounts on your domain. POP Accounts are e-mail addresses that utilize the Post Office Protocol to deliver mail. When you create a POP account on your domain, then you have an e-mail address that you can distribute to others. When mail is sent to this address it is stored on the server, waiting for you to download or view the message.
NOTE: If you ever experience any problems with an e-mail address or any e-mail issue, please consult our technical support department by filling out this form. Please be sure to include the e-mail account that you are having difficulty with and the password to that account.
For information on how to setup an e-mail account that you have created in your Control Panel in your e-mail client, see this tutorial.
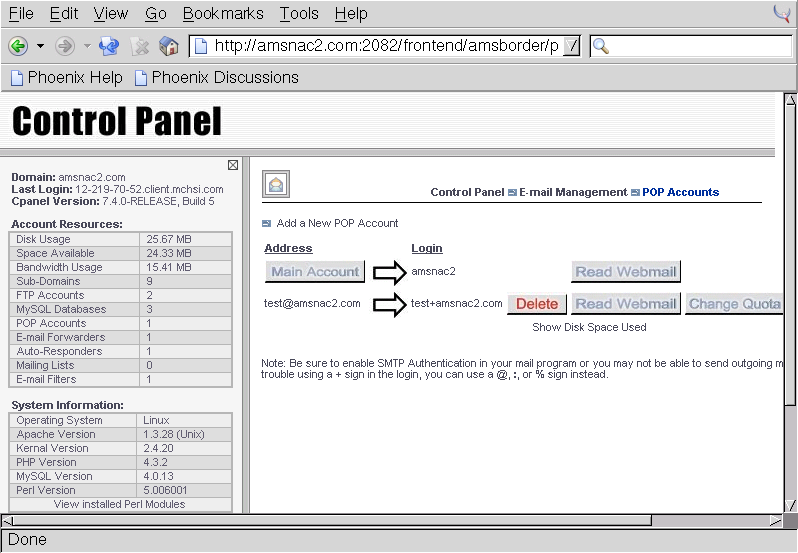
When you click on the Pop Accounts link in your Control Panel you should see a page similiar to the one below.
If you have not created any e-mail accounts the only account you will see will be the Main Account. The Main Account is a special account, if you will notice the Login information for the Main Account, is the same as your username to access the Control Panel. The Main Account, by default, is where unrouted mail will go -- commonly called the default box. Unrouted mail is mail that is sent to any user at your domain name, that does not have a specific e-mail account set up. In the above example, sending mail to joe@amsnac2.com would send the mail to the default box. You will notice that there is no option to Delete, Change Password, or make other changes to the Main Account. This is because the Main Account must always exist.
NOTE: When setting up your e-mail client to download e-mail from the Main Account, you will only need to use a Login/Username that is the same as your Control Panel username. The password to the Main Account is the same as your Control Panel password. For any other account that you create, you will need to use a Login/Username of user@domain.com or user+domain.com. For more information about setting up your e-mail client see this tutorial.
Other options that you will see on this page include:
Delete -- This gives you the option of deleting the POP account. Deleting the POP account will not delete any mail that the account has accumulated. However, deleting the POP account will mean any login information will be lost, and you will not be able to log into the account and download or view the messages. Because of this, it is imperative that you either download the messages or delete the messages from the account before you delete the POP account.
Read Webmail -- This gives you the option to log into the account and view, read, and delete messages through webmail. There is an overview about Webmail later in this section.
Change Quota -- Here you can change the quota or amount of data that a POP account can accumulate. Setting this helps to prevent one account from taking up all of your space and preventing other accounts from receiving mail or hindering web development.
Change Password -- You can change the password of a POP account using this link. This is useful if you forget the password to a POP Account, you can reset it here.
NOTE: We cannot retrieve password for POP Accounts. Please do not write us inquiring about an e-mail account password. If you forgot or lost the password to a POP account, you will need to log into your Control Panel and use the Change Password link to change the password to a POP Account.
To add a new POP Account, click the Add a New POP Account link.
NOTE: The number of POP Accounts you are allowed to create is determined by the plan that your hosting account is set up on. If you decide you need more POP Accounts, you can contact us and the request will be forwarded to our sales department.
To create a POP account, enter the desired account name in the box beside E-Mail Address. You will only need to enter the account name or login name of the account. For example, if your domain name was domain.com and you wanted an e-mail address of scott@domain.com then enter scott in the textbox labeled E-Mail Address. You should only use alphanumeric characters when deciding on an account name.
Next, enter the desired password for the POP account. As always, you will want to choose a password that is not easily guessed. E-Mail accounts can contain vital information about a person, and if another person was able to determine the password to an account, that vital information could be stolen. Using the above example, I might choose a password of faxmachine. If I did this, the information I would need to enter in my e-mail client would be:
Username: scott@domain.com
Password: faxmachine
The last option is where you can define the Quota limit on the account. The default option is 10MB, which is generally a good estimate. In the example in the screenshot, I used a Quota Limit of 0MB. This is equivalent to having an unlimited quota -- unlimited, up until the entire hosting account has reached its quota limit.
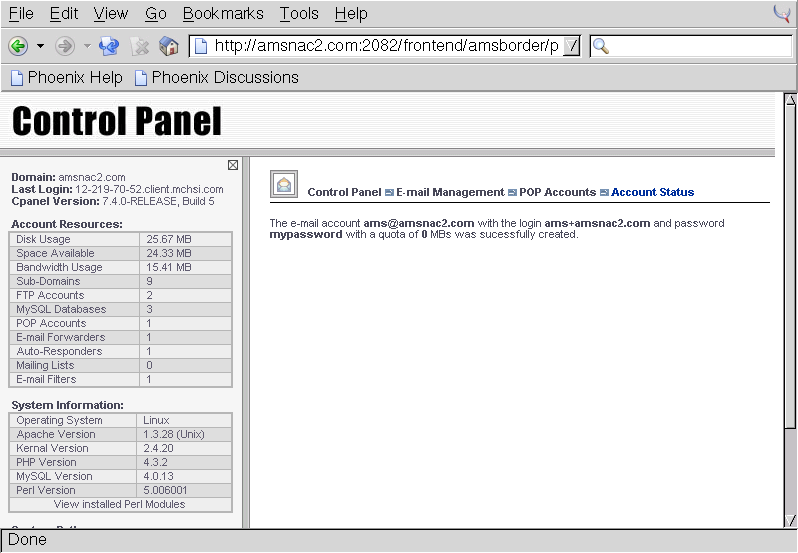
Click the Create button to create the account. You should see a success message similiar to the one below.
The message will tell you the login and password information needed to access the new account.
NOTE: The message will tell you to use user+domain.com as the username when logging into the account. This should work, but we have seen where some client do not accept this method. Alternatively, you should be able to use user@domain.com as the username when logging into the account.
Now when you go back to the POP Accounts page, you will see the newly created account listed with the others. The account is now setup to receive mail and the account can be accessed with the username and password you provided during setup.
If you have any questions or comments concerning e-mail creation, or any general e-mail questions, feel free to contact us. Be sure to include the username and password to any POP account you are having trouble with.